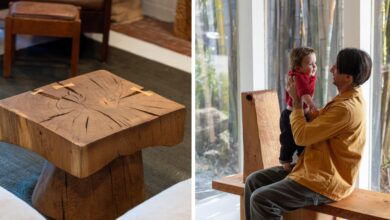

Hey all! Mandi here. Custom framing is so great for that oddly-sized piece of artwork or a deep canvas, but man, oh man, is it ever expensive!
I have a few canvases around my house that I’ve been wanting to have framed, but rather than saving up for a custom job, I thought I’d just take an afternoon to frame them myself!

I designed three different styles of canvas frames with three different mounting techniques, and they’re all super simple to build.
All you need are various pieces of wood and the tools shown below, and guess what? None of them are power tools!
So if you’re a little leery of wielding a power drill, router, or chop saw, don’t worry! You don’t need ’em. This low-fuss method will get the job done.

–various pieces of wood
–wood glue
–finishing nails or wire brads (size depends on depth of wood)
-paint or wood stain
–sandpaper
Tools:
–miter box saw
–band clamp
–various clamps
-hammer
-tape measure
-pencil
-paint brush or rags
To begin, you’ll need to decide which style of mount you want for your frame and how thick and detailed the frame will be. For a wider, chunkier frame, you’ll need spacer wood for between the canvas stretcher and the edge of your frame.
You can bring your art with you to the lumber yard (or just dimensions if you’re shy about toting around your art) and try stacking together different pieces of wood, square dowels, and molding to get the look you want.
Check out my frame profiles below to get ideas for your own frame, and if you want more detail in yours, don’t be shy about adding molding too!

Mounting Techniques
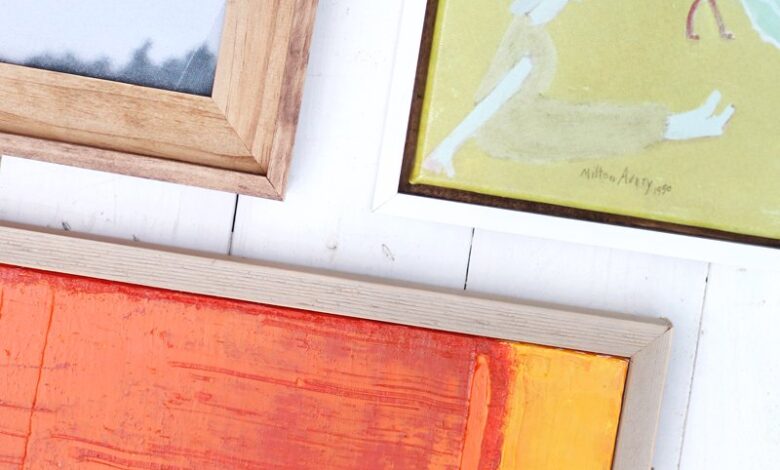
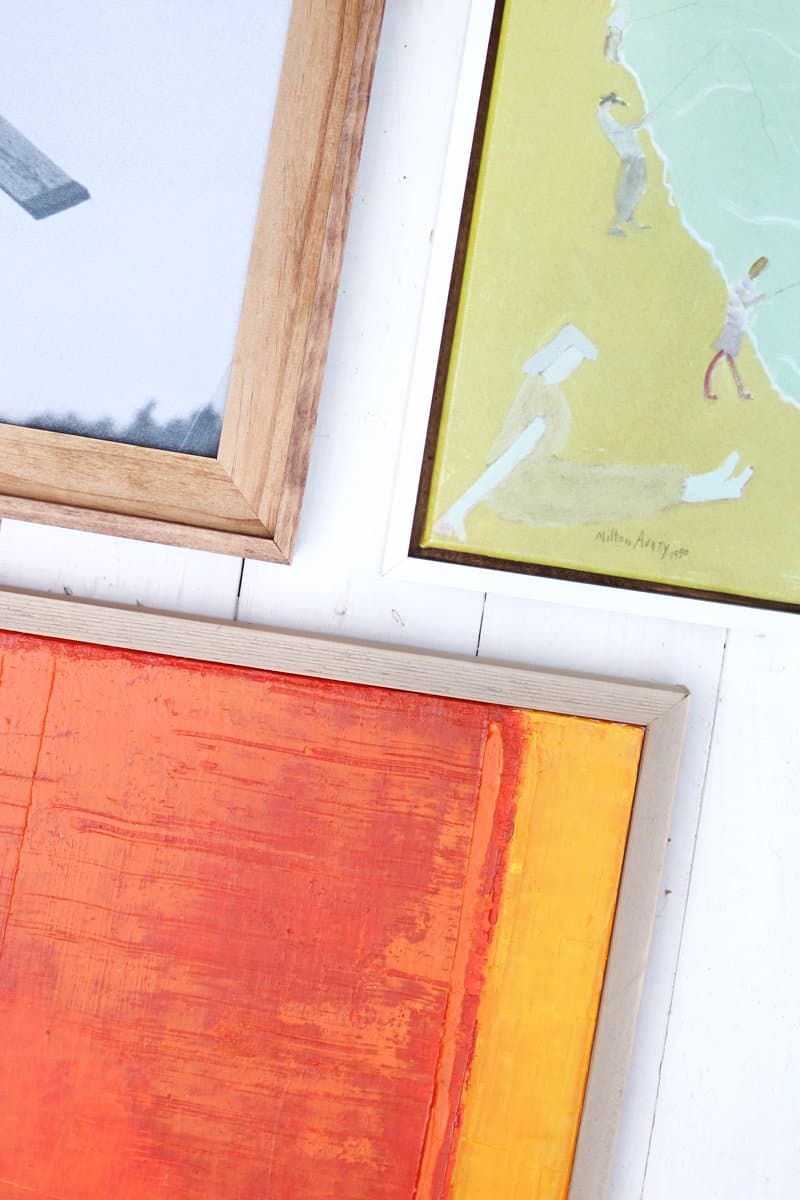
A recessed mount is a traditional framing technique where the art sits behind the frame and the very edge of the art is covered by the lip of the frame.
A float mount, the most difficult to build, is sometimes used in canvas framing to give even more dimension to the piece by creating a decorative gap between the canvas’s edge and the frame’s edge.
Something that you might see more frequently on larger pieces of canvas art is the flush mount, where the frame is simply attached to the edge of the canvas stretcher, with no lip on the front or back.

Flush Mount Frame
The flush mount frame I designed is mounted relatively flush with the surface of the canvas and is nailed directly to the edge of the canvas stretcher, without assembling the frame first.
It’s the easiest frame to make, in my opinion, and I think it looks nice with larger pieces of artwork.

Step One: To begin, I purchased two 8′ long pieces of cedar 1x2s, lightly sanded them, and then stained them with my own gray mix of these three stains pictured above: Rustoleum Driftwood, Rustoleum Willow, and Minwax Golden Oak.
Step Two: Rather than measuring the edge of my frame and transferring those measurements to the lumber, I just laid my 1×2 against the frame and marked the length of the canvas directly onto the lumber.

Step Three: I cut each of my pieces of lumber a bit longer than I needed, in case I made a mistake and cut them too short.
To cut the pieces, use a miter box saw, which clamps the lumber into place and has guides that ensure you are cutting to the exact 45-degree angle that you need.
It’s pretty handy, though it does take more elbow grease than an electric miter saw. After making the cut, you may want to lightly sand down the corners if you have any splintering.

Step Four: Using a band clamp* or a ratchet strap, do a dry fit of the frame to make sure it fits. If any pieces are too long, cut them down appropriately.
When the pieces are cut to the right length and the dry fit shows a nice fit, loosen the band clamp around the loose pieces of the frame and dab paint into the corners where the pieces meet.
Use your finger to spread the glue around a bit before clamping again. Some glue will ooze out when you clamp the frame together, so be sure to have a rag handy to wipe away any glue immediately.
Step Five: Use finishing nails or wire brads to attach the frame to the canvas stretcher, making sure to also drive nails through the mitered joints in the corner, giving the wood glue some extra strength.
Wood glue isn’t very strong when applied to end grains of wood, so the nails are a necessary step unless you use a stronger adhesive like Gorilla Glue.
*When using a band clamp on soft wood, be sure to use a piece of scrap wood as a buffer between the clamp and the wood so the clamp doesn’t leave an imprint on the wood.


Recessed Mount Frame
The traditional recessed mount frame utilizes a rabbet, or inset, for the art to sit nestled in behind the frame. It hides a small border of the art, which works out well if the edges of your canvas aren’t finished.
This frame is assembled prior to attaching the artwork, as opposed to the flush mount frame which is built directly onto the canvas stretcher.
The materials you need to build this particular frame are as follows:
-outside edge piece: 1/2×3″ lumber
-middle piece: 1/2×2″ lumber
-inside edge piece: 1/2″ lumber
-top edge piece: 3/8×2″ lumber

I started with stained wood, because it was my goal to have two tones of stain in my finished frame and decided it would be best to stain first.
The stain didn’t absorb very well on the pine I used, though, so it might not have mattered. You can stain your frame before or after assembling it.
Step One: Glue together the 1/2×3″ outside piece with the middle and inside edge piece as listed in the supplies above and shown in the above right image. You’ll need to use clamps to hold together the wood as the glue dries. Be sure to wipe away any seeping glue with a damp cloth before it dries.

Step Two: After the edge and bottom pieces have dried, attach the top piece, which should be a bit wider than the wood stacked below it, in order to create a lip which will overlap your art.
Spread the glue with your fingers to limit glue seepage. Then clamp together and allow the glue to cure.

Step Three: Measure the size of your artwork and add about 1/8″ buffer space/error space.
Step Four: Cut your lengths of wood with the miter box saw according to the measurements from step three. I like to err on the side of longer than necessary, because you can always cut off more than you need! Lay the parallel boards against each other to make sure they are the same length.

Step Five: Arrange a dry fit with the band clamp and your canvas. Make sure everything fits together relatively snugly. If the canvas is too loose in there, you may need to shave a bit off the lengths of the frame pieces.
After the fit is just right, spread some wood glue with your finger onto the edges of the frame pieces and fit together the joints with the band clamp, wiping away any excess glue before it dries.

Step Six: While the frame is clamped and the glue is drying, drive finishing nails into the joints of the frame to give the piece more stability. I chose to only nail on two parallel frame pieces instead of onto each side.
Flip the frame over and attach the canvas from the back by driving longer nails through the canvas stretchers and into the frame.


Float Mount Frame
I personally think float mount frames look the most professional, but maybe that’s because it was the most finicky of my frames to make, so I was the most proud of this one! Float mounts leave a space between the edge of the canvas and the sides of the frame.
They provide dimensionality to the framed piece and are a great way to show off gallery wrapped edges of canvas art. I personally thought this float mount frame would be great to give a more substantial feel to a thin, less expensive canvas piece.
For my float frame, I used the following wood:
-1/2×2″ lumber painted white
-1/2″ square dowel stained dark (though I suggest using a 1/2×1″ piece of lumber instead)

I chose to start with already-painted side pieces to save me the trouble of trimming in with paint and stain with an assembler frame. I chose a bright white for the outside of the frame and a dark stain to emphasize the float space between the canvas and the frame.
Step One: Glue the bottom piece of the frame to the side piece and clamp into place. Make sure you wipe away the excess glue before it dries!
I used a 1/2″ square dowel for this, but it was exceptionally difficult to later attach the canvas to such a narrow space, so if I were to go back in time, I would select a 1/2×1″ piece of lumber instead.
Follow Steps 3-5 of the recessed mount frame above, but instead of adding 1/8″ to the dimension of the artwork for your frame, add about 1/4″ to create the float space in the frame.

Step Six: Instead of nailing the frame together, you’ll secure it by nailing it to the canvas stretcher from behind. This is the tricky part! You will need to lay your artwork into the frame, making sure the gaps are even all around it. I had a difficult time getting the gaps to stay even as I was clamping it into place.
Once it’s clamped into place properly, flip over the frame and drive nails through the back piece of the frame and into the canvas stretcher.
Make sure you don’t miss the stretcher and drive your nails into the float space instead! I had to drive my nails in at an angle because my 1/2″ square dowel left me hardly any space.
It was a little difficult attaching the canvas to that little dowel in my float frame, but I love the results! Such a handsome frame ready for display!


These kits are really handy when trying to hang pictures and they make some really cool gadgets like this to help you hang things more easily.
Think of the all the possibilities. Happy framing! xo Mandi
P.S. Looking for more wall art DIYs?
DIY Custom Frame
Create a custom frame without using any power tools!
-
Miter box saw
-
Band clamp
-
Various clamps
-
hammer
-
Tape Measure
-
pencil
-
Paint brush or rags
- various pieces of wood
- wood glue
- finishing nails or wire brads size depends on depth of wood
- paint or wood stain
- sandpaper fine grit
Flush Mount Frame
-
To begin, you’ll need to decide which style of mount you want for your frame and how thick and detailed the frame will be. For a wider, chunkier frame, you’ll need spacer wood for between the canvas stretcher and the edge of your frame. You can bring your art with you to the lumber yard (or just dimensions if you’re shy about toting around your art) and try stacking together different pieces of wood, square dowels, and molding to get the look you want. Check out my frame profiles below to get ideas for your own frame, and if you want more detail in yours, don’t be shy about adding molding too!
-
To begin, I purchased two 8′ long pieces of cedar 1x2s, lightly sanded them, and then stained them with my own gray mix of these three stains pictured above: Rustoleum Driftwood, Rustoleum Willow, and Minwax Golden Oak.
-
Rather than measuring the edge of my frame and transferring those measurements to the lumber, I just laid my 1×2 against the frame and marked the length of the canvas directly onto the lumber.
-
I cut each of my pieces of lumber a bit longer than I needed, in case I made a mistake and cut them too short. To cut the pieces, I used a miter box saw which clamps the lumber into place and has guides that ensure you are cutting to the exact 45-degree angle that you need. It’s pretty handy, though it does take more elbow grease than an electric miter saw.
-
Using a band clamp or a ratchet strap, do a dry fit of the frame to make sure it fits. If any pieces are too long, cut them down appropriately. When the pieces are cut to the right length and the dry fit shows a nice fit, loosen the band clamp around the loose pieces of the frame and dab paint into the corners where the pieces meet. Use your finger to spread the glue around a bit before clamping again. Some glue will ooze out when you clamp the frame together, so be sure to have a rag handy to wipe away any glue immediately.
-
Use finishing nails or wire brads to attach the frame to the canvas stretcher, making sure to also drive nails through the mitered joints in the corner, giving the wood glue some extra strength. Wood glue isn’t very strong when applied to end grains of wood, so the nails are a necessary step unless you use a stronger adhesive like Gorilla Glue.
Recessed Mount Frame
-
Needed: outside edge piece: 1/2×3″ lumber-middle piece: 1/2×2″ lumber-inside edge piece: 1/2″ lumber-top edge piece: 3/8×2″ lumber
-
Glue together the 1/2×3″ outside piece with the middle and inside edge piece as listed in the supplies above and shown in the above right image. You’ll need to use clamps to hold together the wood as the glue dries. Be sure to wipe away any seeping glue with a damp cloth before it dries.
-
After the edge and bottom pieces have dried, attach the top piece, which should be a bit wider than the wood stacked below it, in order to create a lip which will overlap your art. Spread the glue with your fingers to limit glue seepage. Then clamp together and allow the glue to cure.
-
Measure the size of your artwork and add about 1/8″ buffer space/error space.
-
Cut your lengths of wood with the miter box saw according to the measurements from step three. I like to err on the side of longer than necessary, because you can always cut off more than you need! Lay the parallel boards against each other to make sure they are the same length.
-
Arrange a dry fit with the band clamp and your canvas. Make sure everything fits together relatively snugly. If the canvas is too loose in there, you may need to shave a bit off the lengths of the frame pieces.
-
After the fit is just right, spread some wood glue with your finger onto the edges of the frame pieces and fit together the joints with the band clamp, wiping away any excess glue before it dries.
-
While the frame is clamped and the glue is drying, drive finishing nails into the joints of the frame to give the piece more stability. I chose to only nail on two parallel frame pieces instead of onto each side.
-
Flip the frame over and attach the canvas from the back by driving longer nails through the canvas stretchers and into the frame.
Float Mount Frame
-
Needed: 1/2×2″ lumber painted white, 1/2″ square dowel stained dark (though I suggest using a 1/2×1″ piece of lumber instead)
-
Glue the bottom piece of the frame to the side piece and clamp into place. Make sure you wipe away the excess glue before it dries! I used a 1/2″ square dowel for this, but it was exceptionally difficult to later attach the canvas to such a narrow space, so if I were to go back in time, I would select a 1/2×1″ piece of lumber instead.
-
Follow Steps 3-5 of the recessed mount frame above, but instead of adding 1/8″ to the dimension of the artwork for your frame, add about 1/4″ to create the float space in the frame.
-
Instead of nailing the frame together, you’ll secure it by nailing it to the canvas stretcher from behind. This is the tricky part! You will need to lay your artwork into the frame, making sure the gaps are even all around it. I had a difficult time getting the gaps to stay even as I was clamping it into place. Once it’s clamped into place properly, flip over the frame and drive nails through the back piece of the frame and into the canvas stretcher. Make sure you don’t miss the stretcher and drive your nails into the float space instead! I had to drive my nails in at an angle because my 1/2″ square dowel left me hardly any space.
-
It was a little difficult attaching the canvas to that little dowel in my float frame, but I love the results! Such a handsome frame ready for display!